
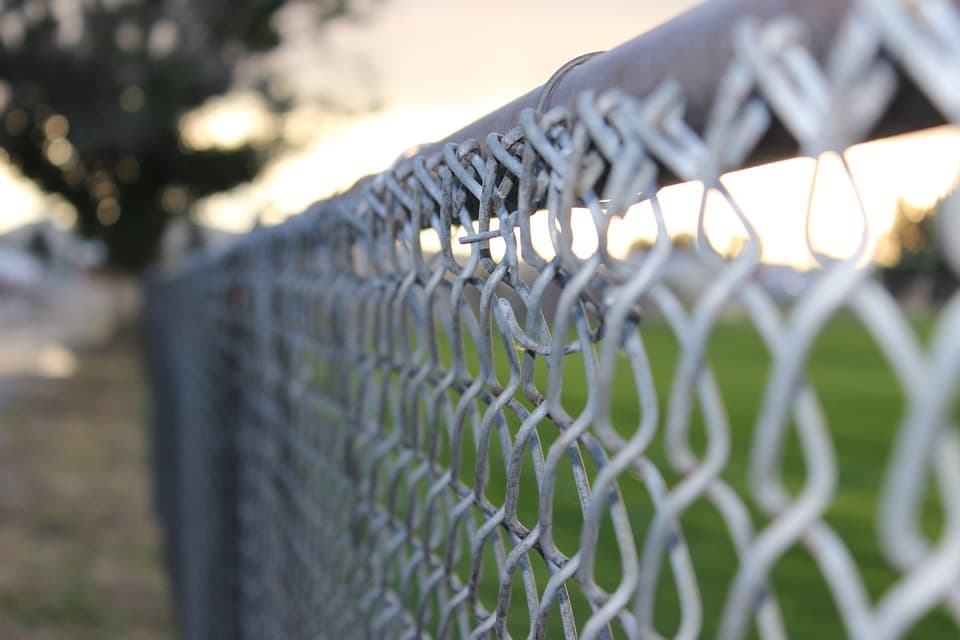
A chain link fence may look simple once it is finished. Posts, rails and wire mesh create a clean boundary around the property.
The installation behind that finished fence is more involved. Layout, property lines, underground utilities, post placement, concrete, gate openings and mesh tension all have to work together.
Get those fundamentals right and chain link fencing can provide practical security without blocking the view across your yard. Get them wrong and you can end up with leaning posts, sagging fabric, poorly operating gates or a fence sitting where it should not be.
This homeowner's guide explains what matters before, during and after chain link fence installation so you can plan the project with fewer surprises.
Project-Guided by Empire Fence
Trusted fencing guidance that turns confusing material choices, property-line concerns, permits, gates and installation requirements into clear next steps. The focus is helping homeowners, property managers and business owners understand project risks early, avoid preventable mistakes and make informed decisions before installing, replacing or repairing a fence.
Quick Answer: What Does Chain Link Fence Installation Involve?
Chain link fence installation starts by confirming the fence layout, property boundaries, utilities, gate locations and material specifications. Terminal and line posts are then positioned, the framework and top rail are installed, chain link fabric is attached and stretched to the correct tension, and gates and final hardware are fitted.
The most important parts are not simply hanging the mesh. Good post placement, a straight layout, stable terminal posts, proper tension and well-planned gates determine how well the finished fence performs.
Chain Link Fence Installation at a Glance
- Best suited for: Security, pet containment, property boundaries, side yards and larger perimeter runs.
- Main components: Terminal posts, line posts, top rail, chain link fabric, tension hardware, ties and gates.
- First checks: Property lines, utilities, permits or HOA requirements, fence purpose and gate locations.
- Critical installation points: Post stability, alignment, gate layout and fabric tension.
- Main material choices: Height, wire gauge, mesh, galvanized or coated finish.
- DIY difficulty: Manageable on some simple projects, harder on long runs, slopes and gate-heavy layouts.
- Major cost factors: Fence length, height, gauge, coating, gates, site access, soil, slope and removal work.
- Common failures: Leaning posts, loose mesh, uneven lines and misaligned gates.
- Maintenance: Generally low, with periodic checks for damage, loose ties, vegetation and gate movement.
Is a Chain Link Fence Right for Your Property?
Chain link fencing works particularly well when you need a practical boundary without completely closing off the property.
It can help contain pets, separate portions of a yard, protect utility areas, secure larger boundaries and provide a visible perimeter around residential or commercial property. Because the mesh remains open, you can maintain sightlines that would disappear behind a solid privacy fence.
Chain link also gives you several specification choices. You are not limited to the traditional silver fence many people picture.
Galvanized fencing provides the familiar metallic finish. Coated options can create a darker, more subtle appearance that blends into landscaping and other exterior features.
Privacy is the main compromise.
Standard chain link does not block views the way wood or vinyl privacy fencing can. Privacy slats or screening can increase visual separation, but those additions also change how the fence behaves in wind and should be considered when the structure is planned.
I usually recommend starting with a more basic question than, "Which fence looks best?"
What does the fence need to do every day?
A fence intended to keep a small dog inside a backyard may need different height, bottom clearance and gate details than a fence being used primarily to define a large property boundary.
The purpose should drive the specification.
What to Decide Before Chain Link Fence Installation
Good fence installation starts before the first post hole is dug.
A qualified chain link fence installation contractor should be able to explain how the proposed layout, gate locations, material specification and site conditions affect the finished fence.
Homeowners should understand those decisions too.
Define What You Need the Fence to Do
Start with the problem you are trying to solve.
Do you need to:
- Keep pets inside?
- Reduce casual access to the yard?
- Mark the property boundary?
- Secure equipment?
- Separate a side yard?
- Protect a garden?
- Enclose a larger residential perimeter?
- Control access through a driveway or walkway?
This decision affects height, mesh, wire gauge, gates and even where the fence should run.
Do not automatically choose a specification because a neighbor used it. Their fence may be solving a different problem.
Confirm Property Lines, Permits and HOA Rules
An existing fence is useful visual information, but it should not automatically be treated as proof of the legal property boundary.
If the proposed fence is close to a property line and there is uncertainty, resolve the boundary before permanent posts go into the ground. Moving a completed fence is much more expensive than checking the layout first.
Also check the rules that apply to your property.
Depending on the city, fence type, height and location, you may need planning approval or a permit. Corner lots, front yards, pools and unusual fence heights can have additional requirements.
If your neighborhood has a homeowners association, review its restrictions as well.
The important point: confirm the rules before buying materials or digging holes.
Locate Underground Utilities Before Digging
Fence installation involves repeated excavation along a long line.
That makes underground utilities one of the most important pre-installation checks.
In California, contact 811 before excavation and follow the required utility-marking process. Do not assume you know where utility lines run because you know where the meters are located.
Also remember that some private underground lines may require separate attention.
Examples can include lines serving outdoor kitchens, pool equipment, irrigation or other private improvements.
Choose the Right Height, Gauge and Finish
Not every chain link fence uses the same wire and framework.
Three important choices are:
Height: Choose the height around what the fence needs to accomplish and what local requirements allow.
Gauge: Wire gauge affects the strength of the fence fabric. A light residential application and a more demanding security application may not need the same material.
Finish: Galvanized chain link provides the traditional metallic look, while coated fencing can soften the appearance and add another layer between the metal and the environment.
Do not choose materials only by comparing the lowest price.
What specification is appropriate for this particular property and purpose?
Plan Gates Before the Posts Go In
Gates should never feel like accessories added after the rest of the fence has been planned.
A gate changes the post layout and creates a point that will be opened, closed, pushed, pulled and loaded repeatedly.
Before installation starts, decide:
- Where pedestrian gates belong
- Whether driveway access is needed
- Required opening width
- Swing direction
- Clearance
- How vehicles or equipment will approach
- Whether the ground changes elevation through the opening
A beautiful fence with a gate that drags every time it opens is still a frustrating fence.
What Parts Make Up a Chain Link Fence?
Understanding the basic parts makes it much easier to follow an estimate or installation plan.
Terminal Posts and Line Posts
Not every fence post does the same job.
Terminal posts are located at important structural points such as ends, corners and gate openings. They help anchor the fence where forces are concentrated.
Line posts support the fence between those terminal points.
This distinction matters because the mesh is stretched across the fence line. Terminal posts need to resist that pulling force rather than simply hold the fabric upright.
Top Rails, Fittings and Chain Link Fabric
The top rail connects the fence framework along the upper edge and helps keep the system aligned.
The visible wire portion of the fence is usually called chain link fabric or mesh.
The fabric is attached to the framework using hardware designed to secure and tension it rather than simply hanging it loosely between posts.
Tension Bars, Tie Wires and Gates
Tension bars and related fittings connect the ends of the chain link fabric to terminal posts.
Tie wires or clips secure the fabric to the framework.
Depending on the design, bottom tension wire may also be used to add support along the lower edge.
Then there are the gates.
Gate posts, hinges, latches, frames and clearance all need to work as one system. A gate deserves its own planning attention because small alignment problems become very noticeable when the gate is used every day.
How Does Chain Link Fence Installation Work?
The exact method depends on the property and fence specification, but a professional installation generally follows the same overall sequence.
Step 1: Lay Out the Fence Line
The fence line is established before excavation begins.
This is when corners, ends, gates and changes in direction should be identified.
Measurements matter here because small layout errors can multiply over a long fence run.
A straight string line or equivalent layout reference helps keep the proposed fence aligned.
Step 2: Set Terminal and Gate Posts
End, corner and gate posts are installed at the main structural points.
These posts deserve particular attention because they receive greater loads than ordinary line posts.
Hole size, depth and footing requirements should be based on the fence design, soil, height and applicable local requirements rather than copied blindly from a generic internet diagram.
The posts also need to be plumb and properly aligned.
A strong footing does not fix a post that was positioned incorrectly.
Step 3: Position the Line Posts
Line posts are installed between terminal points.
Consistent spacing and alignment are important because every visible deviation will show once the top rail and mesh connect the entire run.
The grade should also be watched carefully.
A yard that appears flat from a distance may contain enough elevation change to affect the finished fence.
Step 4: Install Rails and Fittings
Once the post framework is ready, the top rail and appropriate fittings can connect the structure.
This stage begins turning a row of individual posts into a continuous fence frame.
The installer should continue checking alignment instead of assuming the earlier layout remained perfect.
Step 5: Position the Chain Link Fabric
The fabric is unrolled alongside the fence and attached at the starting terminal post.
At this point, it may look like the fence is almost finished.
It is not.
The mesh still needs to be positioned and stretched correctly before it can be securely tied to the framework.
Step 6: Stretch and Tension the Mesh
This is one of the steps that separates a clean chain link installation from a fence that quickly looks loose.
The fabric needs enough tension to sit straight and firm without being distorted.
Too little tension can leave waves or sagging.
Trying to tension fabric against weak or unstable terminal posts creates another problem: instead of the mesh tightening properly, the posts can move.
The framework and the fabric therefore have to work together.
Step 7: Install Gates and Complete the Fence
Gates are hung, aligned and tested.
The installer should check:
- Swing
- Latching
- Clearance
- Post movement
- Mesh attachment
- Hardware
- Bottom condition
- Overall fence line
The finished project should be evaluated as a complete system rather than as individual sections.
Why Posts and Tension Matter More Than Most Homeowners Expect
If I had to point to two things homeowners should pay close attention to, they would be posts and tension.
The chain link mesh is not a rigid wall.
It depends on the framework.
Terminal posts anchor the pulling force created when the fabric is stretched. If those posts move, the tension changes.
That can show up as loose mesh, an uneven fence line or problems around gates and corners.
Line posts have a different role. They support the fence between terminal points and help maintain alignment.
Then there is the fabric itself.
Chain link should not hang loosely from the rail. It needs to be tensioned and secured so the diamonds remain even and the fence feels firm.
Poor tension is easy to notice after the job is finished but harder and more expensive to correct than getting it right during installation.
This is why a chain link fence can look simple while still requiring careful setup.
What Determines Chain Link Fence Installation Cost?
There is no single useful price that applies to every chain link project.
The most accurate estimate comes from the actual property and specification.
Linear Footage
Longer fence runs need more posts, fabric, rail, hardware and labor.
The layout matters too. A simple straight run and the same number of feet broken into multiple corners and gates are not equivalent projects.
Fence Height
A taller fence requires more material and may require stronger framework or different installation details.
Wire Gauge and Mesh Specification
Stronger material generally costs more than lighter residential fabric.
Choose the specification around performance rather than assuming every chain link roll is interchangeable.
Galvanized or Coated Finish
Different finishes and coatings carry different material costs.
Appearance should be considered alongside durability and budget.
Number and Type of Gates
Gates add materials, hardware, structural requirements and installation time.
A pedestrian gate and a large driveway opening create very different scopes.
Ground Conditions
Hard, rocky, soft or otherwise difficult soil can change excavation and footing work.
Slopes and Grade Changes
Sloped ground requires more layout attention than a flat rectangular yard.
It can also affect the relationship between the bottom of the fence and the ground.
Site Access
Can equipment and materials reach the fence line easily?
A large open yard and a narrow side yard behind an occupied home may require different labor approaches.
Existing Fence Removal
If an old fence, concrete footings, vegetation or other obstacles have to be removed first, that is part of the real project cost.
Permit or Approval Requirements
Where permits, surveys or additional approvals are required, they can affect both cost and schedule.
Privacy and Security Add-Ons
Privacy slats, specialty gates, upgraded hardware or heavier security specifications increase the scope.
When comparing estimates, do not compare only the total at the bottom of the page.
Make sure the contractors are pricing the same height, gauge, coating, gates, removal work and installation scope.
Otherwise, the lowest estimate may simply be quoting less fence.
Can You Install a Chain Link Fence Yourself?
Yes, some homeowners can successfully install their own chain link fence.
That does not mean every chain link project is a good DIY job.
When DIY Can Be Reasonable
DIY becomes more realistic when:
- The fence run is short
- The property is relatively flat
- The boundary is clearly known
- Utility marking is complete
- There are few corners
- Gate requirements are simple
- You understand post setting
- You have appropriate tools
- You have help available for handling and stretching fabric
- Local requirements are straightforward
A small utility enclosure is a very different project from fencing an entire property.
When Professional Installation Makes More Sense
Consider professional help when:
- The fence is long
- The terrain slopes
- Soil is difficult
- Multiple gates are involved
- A driveway gate is required
- The property boundary is uncertain
- The fence serves an important safety function
- You need heavier materials
- The layout has many corners
- Existing fencing needs removal
- You are uncertain about permits or local requirements
- You want clear responsibility for the finished installation
For homeowners comparing a fence contractor in Ontario, CA, ask how the contractor plans the fence line, gates and material specification - not simply what the total estimate costs.
A competent installer should be able to explain why the project is being built a certain way.
Common Chain Link Fence Installation Mistakes
Most fence problems are easier to prevent during planning than correct after installation.
1. Assuming the Old Fence Is the Property Line
A fence can be old, crooked or historically placed inside a property.
Confirm uncertain boundaries before building a permanent replacement.
2. Digging Before Utilities Are Located
Fence projects require many holes.
Do not begin excavation until the appropriate utility-location process has been completed.
3. Treating Every Post the Same
End posts, corners and gate posts carry different structural demands from ordinary line posts.
The fence design should account for that difference.
4. Poor Post Alignment
A post can be strong and still be wrong.
If posts are out of line, the top rail and fabric will reveal the problem across the entire run.
5. Rushing the Footings
The framework needs to be stable before significant tension is placed on it.
Rushing ahead can compromise alignment.
6. Leaving the Fabric Too Loose
Loose mesh can sag, wave or move excessively.
Correct tension is one of the defining details of a professional-looking installation.
7. Treating Gates as an Afterthought
Gate location affects posts, access, clearance and daily usability.
Plan openings before finalizing the fence layout.
8. Choosing Material Only by Price
A low material price does not help if the fence specification is wrong for the job.
Match height, gauge and finish to the property's needs.
9. Ignoring the Grade
Even moderate slopes can change how the lower edge of the fence relates to the ground.
That matters especially when the goal is pet containment.
10. Forgetting How the Property Will Be Used Later
Think beyond today's layout.
Will landscaping grow against the fence?
Will equipment need to pass through a gate?
Could a future shed, patio or driveway change access?
A little planning can prevent the fence from becoming an obstacle later.
How to Maintain a Chain Link Fence
One of the advantages of chain link fencing is relatively simple maintenance.
That does not mean it should be ignored indefinitely.
Walk the fence periodically and look for:
- Leaning or damaged posts
- Loose ties
- Bent rails
- Damaged mesh
- Gate sag
- Loose latches or hinges
- Vegetation growing through the fabric
- Damage to protective coatings
- Rust on exposed metal
- Soil changes around posts
Pay particular attention to gates.
They are moving components and usually experience more daily stress than the rest of the fence.
Small problems are generally easier to address before they affect adjacent parts of the fence.
What Should You Ask a Fence Contractor Before Hiring?
A good estimate should tell you more than a total price.
What Fence Material Are You Quoting?
Confirm height, gauge, coating and other important material specifications.
How Are the Gate Openings Being Planned?
Make sure width, location, clearance and swing direction work for the property.
Who Confirms the Fence Layout?
Know what information the contractor expects from you regarding property boundaries.
Who Handles Permit Requirements?
Do not assume.
Clarify who checks requirements and who is responsible for obtaining any approvals included in the scope.
What Happens to the Existing Fence?
If there is an old fence, confirm whether removal and disposal are included.
How Will Slopes or Grade Changes Be Handled?
This matters for appearance, bottom clearance and pet containment.
What Does the Estimate Include?
Look for clear material and work descriptions rather than a single unexplained number.
Is the Work Covered by a Warranty?
Understand what is covered and for how long.
What Happens Before the Crew Leaves?
The fence and gates should be checked against the planned scope, and the work area should be left usable.
The goal is not to interrogate a contractor.
It is to make sure you and the installer are agreeing to the same finished project.
Frequently Asked Questions About Chain Link Fence Installation
How deep should chain link fence posts be?
There is no responsible universal depth for every property. Required depth depends on factors such as fence height, post type, soil, structural demand and local requirements.
Terminal and gate posts generally deserve more structural attention because they carry forces that ordinary line posts do not.
How far apart should chain link fence posts be?
Post spacing depends on the fence system, height, material specification and site conditions.
Use the manufacturer's requirements and the project design rather than assuming one spacing rule applies everywhere.
Do chain link fence posts need concrete?
Concrete is commonly used where posts need stable support, particularly at important structural points.
The exact footing method should match the fence design, soil and applicable requirements rather than being copied from a generic online example.
Can chain link fencing be installed on a slope?
Yes.
The layout and bottom edge need to be planned around the grade so the fence maintains appropriate alignment and ground clearance.
Slopes are one of the situations where professional layout experience can save considerable frustration.
Can you install a chain link fence yourself?
Yes, particularly for a short and relatively simple run on level ground.
Long boundaries, slopes, difficult soil, multiple corners, significant gates and uncertain property-line conditions make professional installation more valuable.
Is galvanized or vinyl-coated chain link better?
Neither is automatically better for every property.
Galvanized fencing provides the traditional metallic finish and practical protection. Coated chain link can provide a darker, less visually prominent appearance and additional surface protection.
Choose based on appearance, environment, specification and budget.
Can a chain link fence provide privacy?
Standard chain link fencing remains open and visible.
Privacy slats or screening can reduce visibility, but they also change the way wind interacts with the fence. If privacy additions are part of the plan, consider them before the framework is installed.
What should I do before fence installation begins?
Confirm the planned fence line, resolve uncertain property boundaries, check local requirements, locate underground utilities, select the fence specification and finalize gate locations.
Those decisions should happen before excavation rather than while the crew is already setting posts.
Plan Your Chain Link Fence Before You Start Digging
A successful chain link project is not simply a matter of putting posts in the ground and attaching wire between them.
The best results start with the right questions:
Where should the fence run? What does it need to contain or protect? Where should the gates go? Which material specification fits the job? Are utilities marked? Are local requirements clear? How will slopes or difficult areas be handled?
Once those answers are clear, the installation becomes much easier to scope correctly.
If you are considering new chain link fencing, Empire Fence can help you review the property, fence purpose, material options and gate layout before the project moves forward.
Get a free estimate and start with a fence plan that makes sense for the way your property is actually used.